Cat netting DIY instructions
Step by step guide

Stretch your netting
Before you begin your should stretch out your netting because it will become compacted during the shipping process.
The tapered parts are the corners. Find all 4 corners and pull them outwards until your netting is more of a rectangle shape.
After pulling / stretching your netting it will become the original size.
Option 1: Simple method

Hang with basic hardware
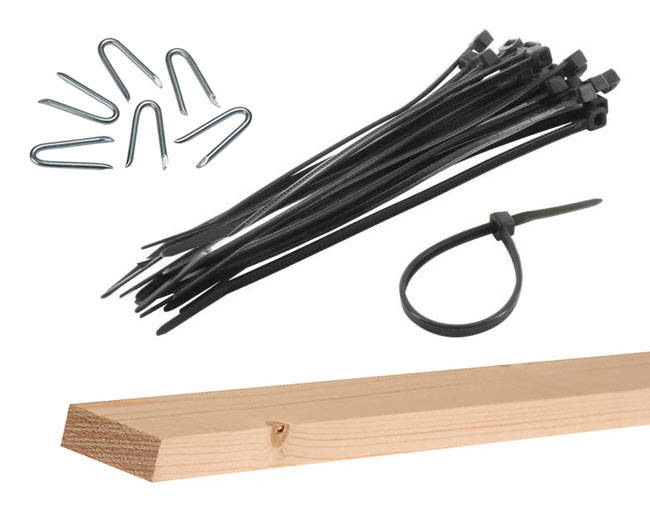
You can easily use hardware like staples or zip ties to hang your netting, or screw a length of timber over the top to fasten into place. It's super easy to use because you can simply cut it to shape using scissors.
This is a fast and easy way to get your outdoor cat enclosure built using the cat net. (Hardware for hanging is not included with netting).
Option 2: Advanced method
Watch the video
Planning & installing your dream catio is easy! Watch this quick video to learn how to get a professional finish that looks amazing from every angle. (Hardware for hanging is not included with netting)

Step 1 - Add eyelets
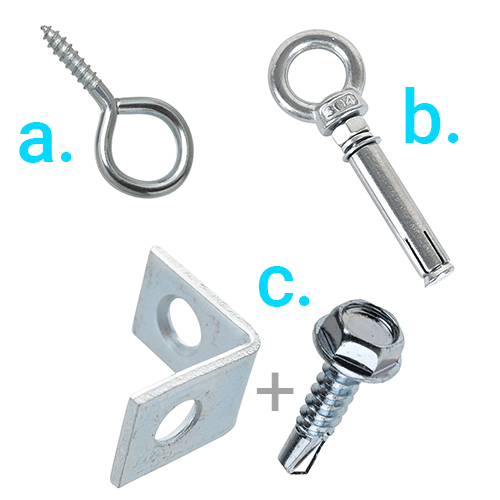
These are the anchors for your catio netting. Place an eyelet at least every 3 feet. There are different types of eyelets for different surfaces:
- Screw eyes for Wood
- Expansion Eyebolts for Bricks & Concrete
- Self drilling screws + Corner braces for Metal
Eyelets can easily be screwed in by drilling a pilot hole then placing a screwdriver through the eye and turning it.

Step 2 - Thread wire rope
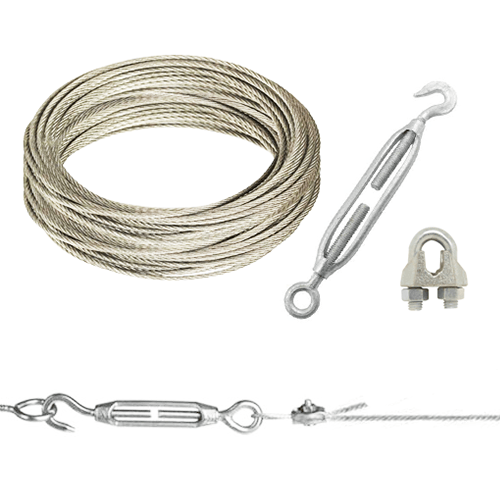
Thread Wire rope through the eyelets and finish each length with a Wire rope clamp. Use a Turnbuckle at one end to tension the wire rope, each turnbuckle can tension a length up to 32 feet.
If your cat net is in a grass or dirt area you can secure Timber along the ground as an anchor point for the netting using fence staples.

Step 3 - Hang catio net
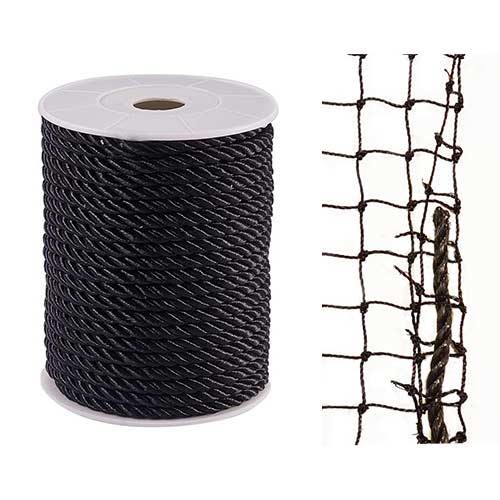
Measure the first piece of cat netting. Create a seam around the piece of net by folding back 1 row of mesh, then thread through the Edging rope. Trim away any excess netting with scissors.
Attach the edging rope to the wire rope using Hog rings & Hog ring pliers, or you can attach the edging rope directly to a fence or wood using Fence staples.
Use a minimum of 5 hog rings or fence staples for every 3 feet. Ensure the cat net is as taught as possible at all times.
Parts for Advanced method

1. Eyelet screws or bolts
Select eyelets for the surface you're fastening to:
a - Screw eyes for wood
b - Expansion eyebolts for bricks & concrete
c - Self drilling screws + corner braces for metal

2. Wire rope parts
Use all of the following items together for each length of wire rope:
- Wire rope (3/32 inch or thicker)
- Turnbuckle (at one end for tension)
- Wire rope clamp (to finish each length)

3. Edging rope
Create a seam around the outside of the netting.
- 3/16 inch or thicker weather resistant rope
Fold back 1 row of the catio netting then weave through the edging rope.

4. Hog rings
Clip the edging rope seam to the wire rope using Hog rings & Hog ring pliers.
Use at least 5 hog rings for every 3 feet.
(Alternatively you can use zip ties)

Fence staples
Another option is using fence staples to fasten the edging rope seam to wooden surfaces such as a fence to hang the cat netting for your catio. You can purchase the cat netting here.

