Cat Gate Instructions V2 - 7.11.23
Cat gate instructions
Follow the instructions to set up your Cat Gate in a doorway or hallway 🐱
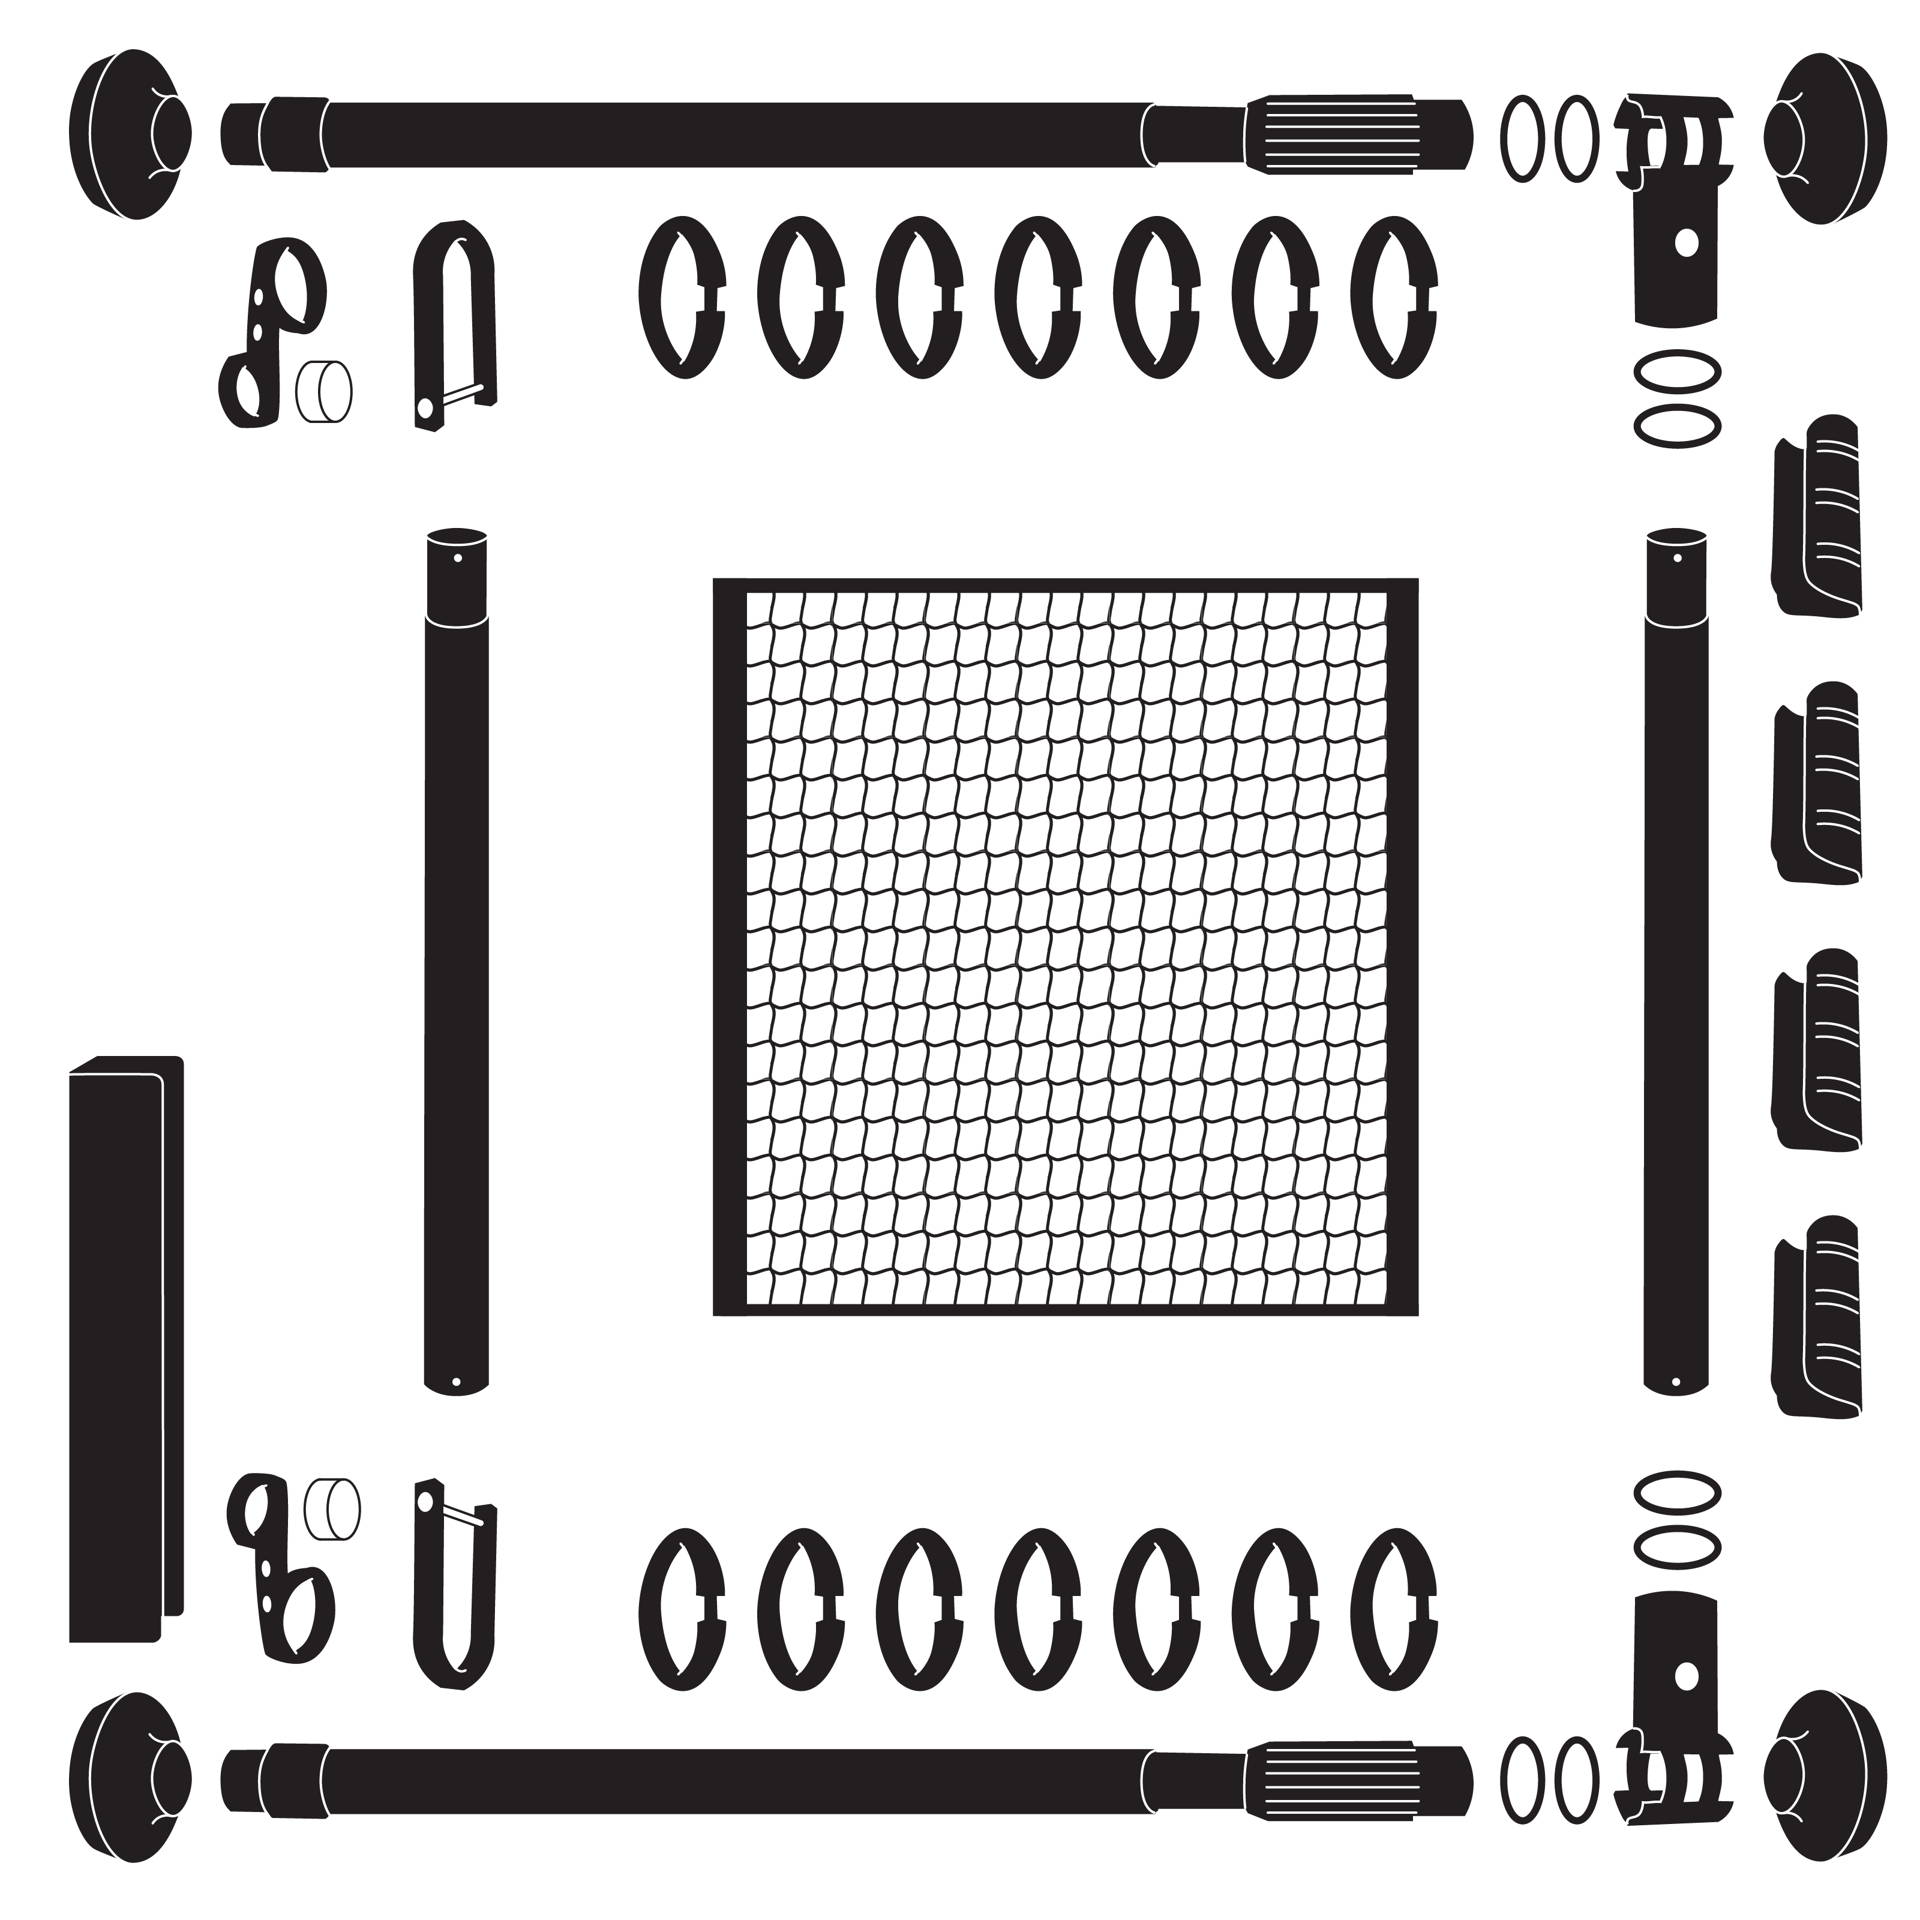
Part placement
You can refer back to this diagram if needed to review the placement of parts.
* The part images aren't drawn to scale here.
* Your parcel will include more rings and plastic clamps than shown here.
1. Assemble the top & bottom rods
For both of the rods:
- Add two O-rings to the handles, about 1/2 inch apart.
- Add an end cap to both ends.
- These will be your top rod & bottom rods.
2. Fit the bottom rod
- Put one end up against your wall or doorway at 90 degrees.
- Extend the rod until the opposite end touches the other side of the hallway or doorway.
- Hold the rod next to the handle, then twist it to lock the length. (Twist the rod in the same direction indicated on the handle for tightening.)
- IMPORTANT! Twisting the rod in the wrong direction means it won't lock correctly and the gate won't hold in place, even though it might feel locked.
- Next, twist the handle to tighten it as marked.
- Check the rod is holding firmly and doesn't easily move.
3. Attach a side rod to the top rod
- Extend one of the side rods to the longest setting (it has a push button).
- Use the horse-shoe shackle and attach it to the top rod (at the thinner end).
- Tighten the horse-shoe shackle using the small allen key. Tighten until the thread is just inside the shackle (don't over-tighten it).
4a. Fit the top rod (end without handle)
- Hold the top rod parallel to the bottom rod, with the shackle and side rod hanging from the end without the handle.
- Gently rest the end of the side rod on the bottom rod.
- Raise the top rod up, so the end of the side rod is about 1/4 inch above the bottom rod.
- Hold the top rod in place for the next step.
4b. Fit the top rod (end with handle)
- Extend the rod until it touches the other side of the hallway / doorway
- Twist the rod to lock the length. Twist in the direction indicated on the handle for tightening.
- IMPORTANT! Twisting the rod in the wrong direction means it won't lock correctly and the gate won't hold in place, even though it might feel locked.
- Twist the handle but not all the way, just enough for it to hold.
- Move the position to gently rest the end of the side rod on the bottom rod.
- Raise the top rod up, so the end of the side rod is about 1/4 inch above the bottom rod.
- Twist the top rod handle to tighten it, as marked.
- Check the rod is holding firmly and doesn't easily move.
5. Thread the side rods into the net
- Extend the remaining side rod to the shorter setting.
- Thread it through a sleeve on the net.
- Take the side rod that's hanging from the top rod, and thread it through the other net sleeve.
6. Attach the fixed side rod
- Put a metal clamp onto the bottom rod handle (where the O-rings are), leaving it open by not tightening it.
- Add two O-rings to the bottom of the side rod, then place it into the metal clamp and tighten it.
- Add two O-rings to the top of the side rod, then attach the other metal clamp and tighten it.
7. Attach the bottom shackle to sliding rod
- Using the small allen key, attach the horse shoe shackle so the rod can slide freely.
8. Attach the magnets
- IMPORTANT! The magnets are super strong, so handle them carefully. Slide them apart rather than pulling them apart.
- Using the small allen key, put the magnet into the smaller hole in the magnet clamp.
- Put the plastic pad onto the top rod, then attach the magnet clamp over the top of the pad.
- Attach the clamp as close as possible to the wall / doorframe.
- Make sure the magnet is centered so it aligns with the sliding rod, otherwise it won't hold closed properly.
- Repeat this process with a magnet on the bottom rod, in line with the top magnet.
- Magnets should always be kept away from electronic devices to avoid damage.
If you need the Cat Gate to close more firmly, place the extra magnets behind the first set to increase the magnetic strength.
9. Attach the rings
- On the top rod add a ring to the first square. Then add another ring every second square.
- Continue along to the other end of the top rod. There may be some net left hanging loose.
- Do the same along the bottom rod.
- You may have spare rings left over, depending on the width of your hallway / doorway.
10. Tidy the net
- Use the long plastic clamps to clip the loose net onto the fixed rod.
- The size 32 clamps go onto the thicker part of the rod, the size 25 clamps go onto the thinner part of the rod.
- Make sure the net isn't pulled tight, it should be kept loose & stretchy so your cat can't climb it.
11. Attach the security channel
- Stick 2 sets of velcro stickers at both ends of the security channel.
- Holding it away from the wall / doorway, check the alignment with the sliding rod (The bottom magnet should sit inside the security channel).
- Once aligned, press firmly to stick it in place.
- Hold firmly for at least 60 seconds to ensure it sticks properly. Don't remove the security channel for at least 24 hours to ensure it is stuck in place.
You're all set!
Now you're ready to use your Cat Gate to keep your furry loved one safe! 🐱💗
View the 72" Extra Tall Cat Gate product here